Monday, October 24, 2016

Strike A Pose Lightroom presets from Sleeklens


I recently added Sleeklens' Strike A Pose bundle of Lightroom presets and brushes to my tools in Lightroom. I am generally reluctant about new LR presets as most of the bundles I've tried in the past have had only two or three useable presets. So, I was surprised at just how many of the powerful presets in this bundle are instantly useful.

The Strike A Pose Lightroom Portrait Bundle comes with 69 portrait presets and 62 brushes. The LR presets are handily grouped into All in One, Base,  Exposure, Color, Tone Tint, Polish, and Vignette. The brushes are grouped into Color Brushes, Face Brushes, Hair Brushes, Haze Brushes, and Light Brushes. The download comes with guides on installing as well as how to stack the presets.

I haven't used the brushes much yet, so I will update when I've used the brushes more. The presets are easy to use and great for instantly improving your photos while allowing one to tweak them to your own personal style and taste.

There are a few sample presets from the bundle that can be downloaded from the website, so you can test them for yourself: Strike-a-pose-portrait-workflow

There is also a Photoshop version available, Portrait Perfection, which I'll write about if I get it in the future.

Monday, September 12, 2016

Reasons why VR Marketing campaigns are successful


Reasons why VR Marketing campaigns are successful:

  • Immersive: by wearing a headset, users are totally immersed in the content of the message
  • Impactful: the intense VR experience generates stronger emotions in users than traditional media
  • Memorable: our brains remember events linked to locations, so VR experiences have a longer trace in the user's memory


  • Novel: early adopters of VR benefit from positive media exposure

Tuesday, June 28, 2016

What is virtual reality and how does it work?

What is virtual reality and how does it work?


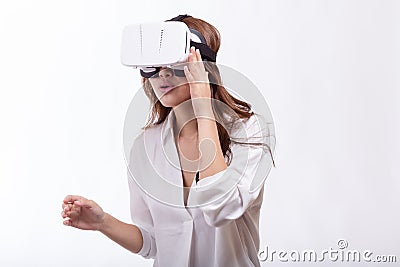
Asian woman in virtual reality headset
© Photographer: Kenneth Paul | Agency: Dreamstime.com

Headsets like those used by Oculus, Sony, HTC, Samsung and Google usually require three things:

A computer, console, or smartphone,

A headset which holds a display in front of your eyes (which could be the phone's display)

Some kind of input (hand tracking, voice, on-device buttons or trackpads)


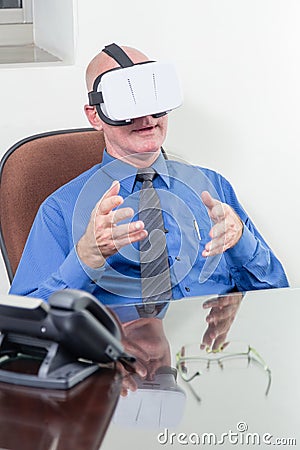
Businessman wearing VR headset, amazed
© Photographer: Kenneth Paul | Agency: Dreamstime.com


VR uses total immersion to create a virtual reality experience so real we forget about the headgear and other accessories.

Asian woman in virtual reality headset
© Photographer: Kenneth Paul | Agency: Dreamstime.com


VR headsets like Oculus Rift and PlayStation VR are referred to as HMDs (head mounted displays). Even with no audio or hand tracking, holding up Google Cardboard to place your smartphone's display in front of your face can be enough to get you half-immersed in a virtual world.


The goal is to create a life size, 3D virtual environment without the boundaries of TV or computer screens.


How does VR work?


Businessman wearing VR headset, amazed
© Photographer: Kenneth Paul | Agency: Dreamstime.com

VR headsets use two feeds; one for each eye. The headsets are called goggles because there are lenses between your eyes and the display.

Asian woman in virtual reality headset
© Photographer: Kenneth Paul | Agency: Dreamstime.com

A stereoscopic 3D image is created by focusing and reshaping the picture for each eye and angling the two 2D images to mimic how our two eyes view the world slightly differently.


If you need photos for virtual reality projects, articles, or marketing, I've made a lightbox of my VR stock photos at Shutterstock: Stock photos of people using VR headsets


Thursday, June 23, 2016

Panasonic Lumix FZ1000 Shooting Modes (Part 5 of FZ1000 Review)


Panasonic Lumix FZ1000 shooting modes (Part 5 of FZ1000 Review)


If you haven't read them yet, parts 1, 2, 3 & 4 can be found at the links below.
Panasonic Lumix FZ1000 Review (part 1)
Panasonic Lumix FZ1000 review (Part 2)
Panasonic Lumix FZ1000 Review (Part 3)

Panasonic Lumix FZ1000 Review (Part 4)


The Lumix FZ1000's mode dial has all the shooting modes represented by a white icon on a black background. There are two intelligent Auto modes: Intelligent Auto and Intelligent Auto Plus. Both use scene detection to determine correct exposure using one of nine scene modes including portrait, macro, handheld night shot, baby, and sunset.


If the camera is on a tripod, Intelligent Auto sets a slower shutter speed than for hand-held shots and automatically sets face/eye detect autofocus, backlight compensation, and intelligent ISO, i.resolution, and i.dynamic and enhances images with sharpness or contrast.


Intelligent Auto Plus allows you to change the auto exposure settings. Both modes allow background defocus to produce more or less depth of field, but Intelligent Auto Plus allows exposure compensation and color balance adjustment using the rear thumb dial. Other menu settings available in Intelligent Auto Plus include photo styles, image quality, and single or continuous AF.


In the PASM modes the rear thumb dial is used to change exposure settings. In Manual mode you switch between aperture and shutter speed control by pressing the dial.


The FZ1000 can use a mechanical or electronic shutter. The range of the mechanical shutter is 60s to 1/4000 plus a bulb setting with a maximum of two minutes. The electronic shutter extends the shutter speed range to 1/16000. Silent mode automatically selects the electronic shutter and turns off the flash, AF illuminator, and other sounds.


The FZ1000's mode dial's palette icon provides access to 22 Creative control filter effects.


Four of the filters are monochrome- Monochrome, Rough Monochrome, Silky monochrome, and Dynamic monochrome. Others include Old days, Toy pop, Bleach bypass, Fantasy and sunshine.


Most Creative effects filters can be adjusted, and can be used with video, except Rough monochrome, Silky monochrome, Soft focus, Star filter and Sunshine. Creative effects cannot be applied in 4K which needs the mode dial to be set to Creative video.


The Multiple Exposure mode can automatically combine up to four images. The Lumix FZ1000 has a traditional Time Lapse Shot mode and Stop Motion Animation. In either mode, the FZ1000 can assemble the sequence into a movie; the still photos are kept if you want to use them later.

Monday, May 23, 2016

Panasonic Lumix FZ1000 Viewfinder and Screen (Part 4 of FZ1000 Review)


Panasonic Lumix FZ1000 review (Part 4)


Panasonic Lumix FZ1000 Viewfinder and Screen


If you haven't read them yet, parts 1, 2, & 3 can be found at the links below.
Panasonic Lumix FZ1000 Review (part 1)
Panasonic Lumix FZ1000 review (Part 2)
Panasonic Lumix FZ1000 Review (Part 3)

The FZ1000 has an articulated 3-inch screen and high quality OLED electronic viewfinder with 0.7x (35mm equivalent) magnification for composition.


The native 3:2 image ratio for stills doesn't fill the 4:3 viewfinder, so narrow black bands appear at the top and bottom. These areas display information; shooting mode, photo style, flash mode, movie mode, image size and quality, focus mode and battery life on the top; and metering mode, aperture and shutter speed, exposure compensation and card capacity at the bottom.


The viewfinder quality is excellent. It's big and bright although there is a slight lag when panning.


The 3-inch TFT LCD screen has 920k dot resolution and is 3:2 proportioned so stills fill the entire screen area. The articulated screen can be positioned at any angle and folded in when not in use.


An eye sensor underneath the FZ1000's viewfinder switches from screen to viewfinder when you raise your eye to it. If you want to see the EVF image as soon as you put your eye to it, Fn5 toggles between EVF and screen displays. This is also useful to stop the EVF switching when you don't want it to, for instance I found this pretty annoying when shooting from the hip or kneeling down.


The Disp button on the rear toggles between the four viewfinder displays:

  1. full information
  2. full information with a two-axis level
  3. exposure details
  4. exposure details with a two-axis level
    The viewfinder display is replicated when you switch to the screen, but the screen has two extra options: a detailed information only display and blank.
     
    If you're not using the screen, set the blank option as it uses less battery power.
Part 5 of Panasonic FZ1000 Review (Shooting Modes)

Thursday, May 19, 2016

Panasonic Lumix FZ1000 Autofocus (Part 3 of FZ1000 Review)


Panasonic Lumix FZ1000 review (Part 3)

Panasonic Lumix FZ1000 Autofocus


If you haven't read them yet, parts 1 & 2 can be found at the links below.
Panasonic Lumix FZ1000 Review (part 1)
Panasonic Lumix FZ1000 review (Part 2)


Panasonic Lumix FZ1000 Autofocus


The FZ1000 has a contrast-based AF system with 49 AF areas. It supports eye as well as face detection.


The FZ1000 uses the same defocus DFD technology as the Panasonic GH4, which profiles the out-of-focus characteristics of the lens to establish where the focus is. This lets the FZ1000 get close to the correct point of focus quickly, before using traditional contrast-based method to fine-tune.


The autofocus is quite fast, even in fairly low light levels. The FZ1000 has good focusing assistance for manual focusing including peaking, and the ring on the lens barrel can be configured to adjust focus rather than zoom.


See part 4 here: FZ1000 Viewfinder and LCD Screen

Wednesday, May 18, 2016

Panasonic Lumix FZ1000 Design and Controls (Part 2 of FZ1000 Review)


Panasonic Lumix FZ1000 review (Part 2)


Panasonic Lumix FZ1000 Design and Controls


The Panasonic Lumix FZ1000 is more like a DSLR than a standard super zoom. The only similarity to a super zoom is the fixed lens. I did consider the Sony RX10 or RX100 instead as they are smaller form factors and both have the criteria I wanted.


The FZ1000 measures 137x99x131 mm and weighs 831 g with battery and SD card. It is quite hefty; an entry level DSLR such as the Nikon D3300 with a 18-55mm kit lens actually weighs 20% less than a FZ1000.


The size makes it comfortable to hold and also allows ample room for the FZ1000's numerous physical controls.


The FZ1000's large lens barrel diameter provides good support for your left hand and allows comfortable operation on the dual purpose zoom/focus ring. The zoom ring is smooth but slow, so small adjustments are better with the rocker switch around the shutter.


There's a mode dial on the top left, and the main mode dial on the upper right side. A rear thumb dial is only control wheel. The dial is pushed in to switch function between aperture and shutter in manual mode.


The FZ1000 has five programmable function buttons. Fn1 is slightly larger and protrudes slightly, making it easy to differentiate from the smaller, flush mounted Fn2 behind it. Fn5 to the back left of the viewfinder toggles the display between the electronic viewfinder and the LCD screen. In default mode this happens automatically via an eye sensor below the eyepiece, but it's good to have the override when shooting from the waist using the articulated screen. Fn3, the Q.menu button, is on the right side of the viewfinder close to Fn4 which is the four-way controller. Also on the back right are a three-way switch for selecting AF modes, the playback button, and display overlay toggle button.


There's a mini HDMI port, USB / A/V out port, and a socket for the DMW-RSL1 wired remote on the right side of the body. On the other side there's a port for an external stereo microphone, but no headphone socket.


From a full charge you can get 360 shots from the FZ1000's DMW-BLC12E battery, so spare batteries are essential. I bought an extra three and so far haven't needed more.


The FZ1000 has a pop-up flash which is raised by sliding a switch on the right of the viewfinder. It has a maximum range of 13.5 meters and has forced on, forced on red-eye, slow sync and slow sync red-eye modes. The standard hot shoe allows you to fit an external flash. I've tested it with a few Yongnous and it works fine.


Read Part 3 of Panasonic Lumix FZ1000 Review

Panasonic Lumix FZ1000 Review (Links to parts)

Panasonic Lumix FZ1000 Review (Part 1) Introduction


Panasonic Lumix FZ1000 review (Part 2) Design & Controls
Panasonic Lumix FZ1000 Review (Part 3) Autofocus
Pansonic Lumix FZ1000 Review (Part 4) Viewfinder & Screen
Panasonic Lumix FZ1000 Review (Part 5) Shooting Modes

Panasonic Lumix FZ1000 review (Part 1)


Panasonic Lumix FZ1000 review (Part 1)


I've had the FZ1000 for a few months now and thought I'd share some thoughts on it. I was choosing between the FZ and the RX10II, but as far as I could make out the FZ1000 did everything I wanted at a lower price than the RX10II. I didn't care about photos as I use my Canon 6D for images. I was primarily interested in the 4K and slo-mo video capabilities. Both of these lived up to my expectations.  

Panasonic Lumix FZ1000 Introduction


The Panasonic Lumix FZ1000 is a DSLR-styled super-zoom camera with a 16x / 25-400mm range, a 1 inch sensor and 4k video recording. The FZ1000 was the first compact camera to record video at resolutions up to 4K (3,840x2,160) in MP4 at 30/25fps or 24fps.


The FZ1000 has a 20 MP/1 inch sensor with four times the surface area of models delivering lower noise, wider dynamic range, and higher resolution. The lens starts at f2.8 on the wide-end and ends at f4 at the long end.


The FZ1000 has the same fully-articulated 3 inch LCD screen and a 2359k dot OLED viewfinder as the Lumix GH4, top shutter speeds of 1/4000 or 1/16000 (with mechanical or electronic shutters), 12fps continuous shooting, built-in Wifi with NFC, autofocusing down to -4EV, and defocus profiling from the GH4, an external mic socket, and support for 1080p video at up to 120fps (100fps in PAL regions), or 4K UHD at 25 or 30fps.


Part 2 of the review can be found here.

Friday, May 6, 2016


This handy infographic created by MakeAWebsiteHub.com shows you eight social media sites and the image size requirements for each so that you can optimize your sites.


Saturday, March 12, 2016

How to find out who owns the copyright to an image

How to find out who owns the copyright to an image: Find out who owns the copyright to an image quickly and easily with our guide on where to look for the details you need

Tuesday, August 25, 2015

Print your own Photo Book


Most people these days are happy with storing their photos as digital images on their on their smart phones or tablets. Even photographers are leaning more towards digital portfolios. However, these do not leave the same impression as a printed book or portfolio. Holding and paging through a printed book is a far more enjoyable experience, and for photographers they can be a valuable marketing tool.


AdoramaPIX is currently offering a 25% discount on photo books until September 30, 2015. Just head over to the AdoramaPIX website, design your photo book and use the discount code "PKBKAFF20" when you place your order.


I only recommend services that I use myself. I tried the AdoramaPIX design interface to make my own photo book for my portfolio and it is incredibly simple and easy to use but allows a great deal of customization.


The easiest way to do it is to simply upload your photos, choose your theme, and use the auto-arrange feature to have their system place your photos into an attractive layout instantly.

Or you can add the photos yourself and customize the layout. Customization options include moving and resizing photos, changing the numbers of photos on a page, adding different background, stickers, and borders, and adding text.

The books are well priced, starting at $26 for a 10 page hardcover book. Different covers can be chosen including faux leather, leather, and fabric. And extra pages can be added as needed.

Extra options which AdoramaPIX give you are adding blank pages at the beginning and end of the book and color correcting images for you.


Here are some suggestions for when you make your photo book:


  • Decide on the purpose of your photo book and select a theme, book size, and photo paper that best matches that.


  • Upload your highest resolution images to allow for possible cropping and maintaining the best quality.


  • There are many layouts and options for additional stickers and borders. These might be fine for family or memento photo books, but I suggest avoiding them for portfolio books.


So, if you are itching to hold your own photo book in your hands, head over to AdoramaPIX and use the photo book discount code “PKBKAFF20” to get 25% off your Photo Books until September 30, 2015.


Thursday, August 6, 2015

Images for Book Covers on Arcangel


I recently started getting more interested in fine art and conceptual photography, but I had no outlet to sell this kind of work. So I was happy when Arcangel Images agreed to represent my work.


Arcangel is an agency that focuses on fine art and conceptual photography for the publishing industry, mainly book covers. A lot of  the images on the covers of bestselling novels came from Arcangel.


My portfolio there is currently quite small as it is a specialized agency with a specific target market, so it takes longer to build up a portfolio there.


All the images in my Arcangel portfolio are Rights Managed for sole usage worldwide so I cannot submit the same work to other stock agencies. See my collection of Rights Managed images here: Images by Kenny on Arcangel


Wednesday, August 5, 2015

Typhoon Matmo in Taiwan, July 23, 2014


With Super Typhoon Soudelor set to hit Taiwan this Friday, I thought it is a good time to show the power of Typhoon Matmo from July 2014.

Stock Footage of Typhoon Matmo in Taiwan

 
Typhoon Matmo made landfall in Taiwan at midnight local time, July 23, 2014. It brought severe winds and torrential rain to Taiwan. At least 10 people were injured. It washed out one bridge, and disrupted electricity in Hualien on the east of Taiwan, but it did not cause much other damage.

Typhoon Matmo in Taiwan


Matmo made landfall with winds of over 160 km/h. The heaviest rain the typhoon brought was across the higher terrain of the east and interior Taiwan, dumping 650 millimeters of rain in the mountainous areas in the eastern coastal counties of Taitung and Hualien. Taipei had rainfall of 50–100 mm with wind gusts close to 100 km/h.

HD Stock Footage of Typhoon Matmo in Taiwan


Wednesday, July 15, 2015

Does your creative team NEED a better brief?

Child writing at desk gets an idea
© Photographer: Kenneth Paul | Agency: Dreamstime.com


I find briefs that are too comprehensive often restrict ideas from a creative team. Sometimes stifling excellent ideas. This is a great article about what they don't teach you about briefs at advertising school.

Thursday, June 11, 2015

Frames and borders for education and classroom use

Alphabet magnets forming frame on whiteboard
Alphabet magnets forming frame
© Photographer: Kenneth Paul | Agency: Dreamstime.com

Do you often find yourself looking for the perfect frame or border for your school's advertisements, flyers, brochures, etc?

Alphabet magnets forming frame on whiteboard
Alphabet magnets forming border
© Photographer: Kenneth Paul | Agency: Dreamstime.com

I recently did a shoot of these useful frames/borders with letters of the alphabet forming the border specifically for this purpose. These high-resolution alphabet frame images are perfect for classrooms or designers who need education themed pictures for websites, magazines, and wall hangings. The copy space can be combined with your choice of images, messages, or inspirational text.

 
Alphabet magnets forming frame on whiteboard
Alphabet magnets forming border for copy space
© Photographer: Kenneth Paul | Agency: Dreamstime.com


The set also includes some with text inside the alphabet border, like this one that says "I Love English" which is suitable for ESL/EFL or young learner environments.
Alphabet magnets on whiteboard
I Love English with alphabet border
© Photographer: Kenneth Paul | Agency: Dreamstime.com


I'll be adding more styles of frames soon and update this post as I do.

Tuesday, June 2, 2015

Taiwanese Aboriginal Fashion Show with Amis Artist Yosifu

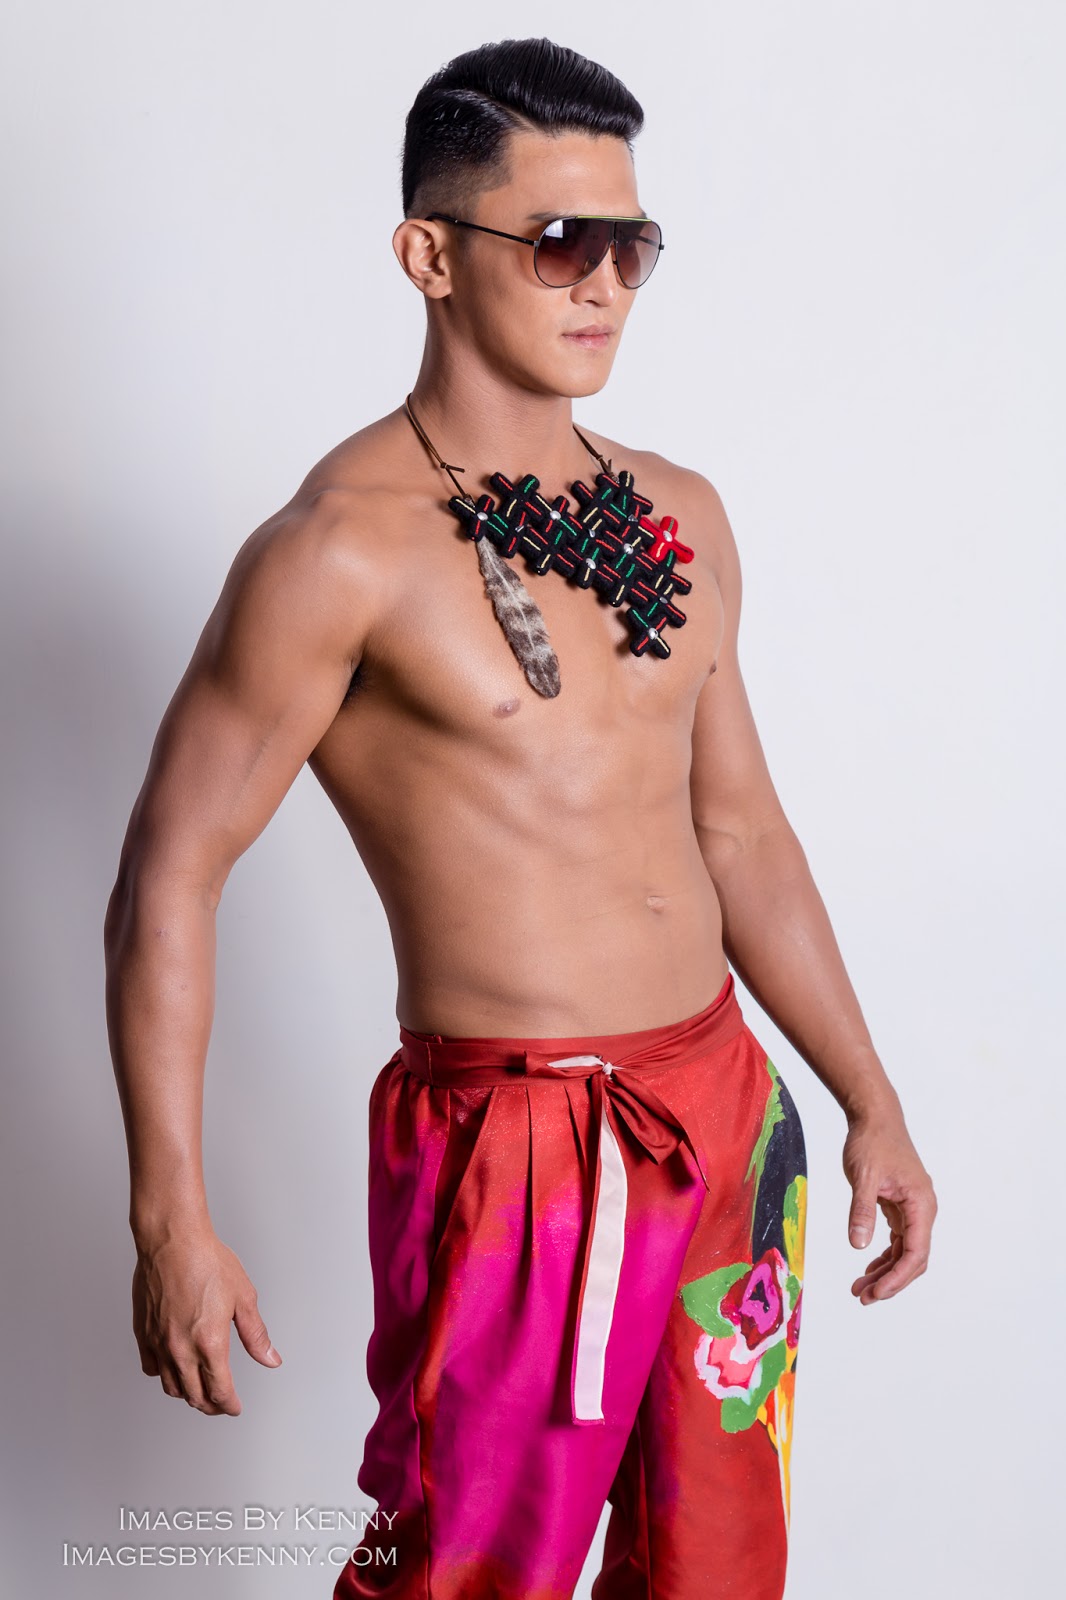
Taiwan fashion photography
 
I recently shot a fashion show of an amazing Amis designer named Yosifu at the Yosifu Art Gallery in Taipei. The gallery itself has many of his incredible works displayed featuring distinctive aboriginal themes with lots of bright open spaces making it a relaxed atmosphere for viewers.


When I got there, they were busy doing a rehearsal for the show. After the rehearsal I had about 45 minutes to shoot models adorning each of the dozen or so pieces before the show itself started. I made five or six shots of each before the venue started to fill up and I needed to take down the lighting setup. Quite a few Taiwanese celebrities attended the event, from singers to actors from Seediq Bale. 
Taiwan fashion photography

Yosifu's event went beyond a conventional fashion show. The fashion show included original music performances and dance performances in addition to the runway models, which all integrated into a unified theme. Yosifu is first and foremost an artist and his art integrated into the fashion offered fashion goers an artistic display on the runway.

Taiwan fashion photography
It was a pleasure to shoot his artworks both on and off the runway. Yosifu explores social issues surrounding indigenous cultures and through his work, which I find quite fascinating. I would have liked to learn about the stories and traditional indigenous customs behind the art on the fashion pieces, but I didn't get much chance to talk to Yosifu. I will try at a later stage to discuss them with him.  
Taiwan fashion photography


Yosifu has an interesting and inspiring history. He was born in Matailing, Hualien County, Taiwan and is part of the Amis tribe of aboriginal people found on the east of the island. The Amis are one of the sixteen officially recognized indigenous groups of Taiwanese aborigines.

Taiwan fashion photography

He originally planned to be a singer, so at age 18 he formed a band with friends. They got a chance to release an album, but later were prevented from working due to a dispute between their agent and record company. Yosifu got depressed about not being able to pursue his singing career. He took a break from his troubles and visited a friend in Edinburgh, U.K in 1998. He was captivated by the city’s beauty and vibrant arts scene, and he has lived in Edinburgh ever since.

Aboriginal Fashion Show

To make ends meet, he started painting houses. Yosifu started exploring his new interest in art, at first copying famous paintings. His landlord introduced Yosifu to an art agent, who invited Yosifu to participate in an exhibition featuring oil paintings by 10 emerging artists. Yosifu was the first one to sell a piece on the opening day of the event.

Aboriginal Fashion Show

This encouraged Yosifu to devote more time to his art, and he gained the confidence to approach galleries, luxury hotels, and upscale restaurants to promote his work. Their response wasn't positive, so he began to lose hope after many rejections. One day at a local café Yosifu found out that there was an opening to display work for five days. He sold 12 of the 15 works he exhibited there.

Aboriginal Fashion Show

To make his work more marketable, Yosifu started experimenting with painting animals, flowers and other popular subjects. In 2008 he started developing his own style by expressing his experiences and feelings through his art. A British friend inspired him to reflect on his own cultural identity as a Taiwanese aboriginal in his artistic ideals.

Dancers at Aboriginal Fashion Show
Dancers at Aboriginal Fashion Show in Taiwan

Yosifu returned to Taiwan to stay in his hometown and other tribal villages in 2010, to gain a deeper understanding of indigenous cultures and traditions. The journey reconnected him with tribal communities and became a source of inspiration for his artistic creations. He now returns to Taiwan for three months a year to visit aboriginal villages around the island, teach children to draw, and exhibit new paintings. His work has been displayed at over 20 exhibitions locally and in the UK and he has been invited to open exhibitions all over Europe and Asia.
Aboriginal Fashion Show

Yosifu is proud of his country's culture and is happy to be able to introduce the beauty and dignity of aboriginal cultures to the world, attracting more and more people to discover Taiwan's indigenous cultures and traditions. Since so many indigenous traditions are fading away and many young aboriginals are not familiar with their own culture, Yosifu has taken on the responsibility to record and present the stories and cultures for aboriginals in Taiwan through his creativity.
Aboriginal Fashion Show

His work displays the dignity, spirit and traditions of Taiwan’s indigenous tribes and also addresses serious issues indigenous people face, like the expropriation of ancestral lands and suppression of aboriginal languages. Yosifu hopes his creations can show his concerns about Taiwan's environmental issues such as deforestation, pollution, urban renewal projects, and nuclear waste disposal and inspire people to protect the environment and preserve the indigenous cultures and traditions.

Aboriginal Fashion Show

He brings his work to life with his use of vivid, warm, rich colors with light and shade which adds dramatic intensity. These elements in his art are evocative of fashion images. Which is why his art has extensive applications in the fashion and creative industries—French cosmetics and beauty company L’Oréal even used his "Driftwood" work as a projected backdrop for a hair and fashion show in Dubai in 2014.

Aboriginal Fashion Show

His work is popular in Europe and Asia, and his works have been bought by private collectors from Scotland, England, Australia, Brazil, Canada, Hong Kong, Singapore, Spain, Taiwan, and Sweden.

Aboriginal Fashion Show
To see more photos from the fashion show, check out the Yosifu Fashion Show Facebook album

To see his art in person, go to Yosifu Art:

Address: 7F., No.9, Sec. 1, Jinshan S. Rd., Zhongzheng Dist., Taipei City.


Hours: Closed Mondays, open Tuesday to Sunday.  
Aboriginal Fashion Show

Monday, June 1, 2015

Animals Taiwan Calendar Shoot


Last November I was contacted to see if I was interested in shooting a calendar for Animals Taiwan. I have done some video shoots for them before and was keen to help promote their excellent shelter again by raising funds through the calendar and hopefully raising awareness at the same time. Animals Taiwan is an organization that promotes responsible pet ownership and helps rehome rescue dogs in Taiwan.
 
 
We had a lot of things to plan as we had dogs, contortionists, drag queens, yoga practitioners and various other colorful people for the shoot. The common theme through the calendar was cars, so we also had a range of awesome cars, including a Porsche, Ferrari, MG, and Morgan. We only had access to the cars for one day, which meant the entire shoot had to be done on that day. We were planning an 18-month calendar, so this was not an easy task to shoot 18 scenes in a single day while trying to schedule everyone to be there when the light was right for the outdoor scenes.

To get everything to run smoothly, I draw up lighting diagrams for each scene. But on shooting day the flash sync ports in two of my strobes stopped working, which meant that I needed to rearrange all the lighting to shoot in slave mode. This changes things a lot as in slave mode, the receptor cell has to be in line of sight of the light that is triggering it to function, which severely limits the positioning of the lights. It also limits how they can be positioned outdoors as the sunlight wreaks havoc on the receptors ability to sense the triggering light.

I used a Canon 6D with a Canon 24-105 mm f4 lens. For lighting I used three Godox SDI 250 strobes in two brolly boxes and one 180 cm parabolic umbrella. The only exception being a shot at the riverside where there was no power, so I went with speedlites. Besides the riverside shot, the other scenes were inside and around Autocheckers, a garage next to Animals Taiwan.

The idea I was going for with the images was an animated painterly style with cinematic framing. The final calendar was launched last month as an 18-month calendar running from July 2015 to December 2016.
 
Taipei Times covered the launch of the calendar here: Help for the Helpless
 
If you'd like to support the homeless dogs of Taiwan by buying a calendar, make a payment into the Paypal account at donations@animalstaiwan.org and e-mail Liza Milne at liza@animalstaiwan.org with your delivery details. Prices are below:


Thursday, May 21, 2015

Beauty Shoot with Taiwanese Model

Asian beauty applying cream to face
Taiwanese woman applying cream to face, beauty shot
© Photographer: Kenneth Paul | Agency: Dreamstime.com
I was organizing a beauty shoot a few weeks ago. The ideas about beauty in Asia are different to those in the West. In brief (I will do a more in-depth post about this soon), Chinese woman prefer whiter looking skin, bigger eyes, and less accentuated facial features (So less contouring and highlighting to get a flatter appearance).
Asian beauty portrait
Chinese woman beauty shoot
© Photographer: Kenneth Paul | Agency: Dreamstime.com
The tendency towards whiter paler skin comes from stereotypes about social status; darker skinned people are seen as sun-baked laborers who work in the fields. This is quite different from the Western perception of paler people being unhealthy or ill. To exaggerate this look, beauty photos in Taiwan are often slightly overexposed to wash out more detail. In addition the model would wear foundation that is perhaps a shade or two lighter than her actual skin tone to get a brighter complexion.
Asian beauty portrait
Taiwanese woman beauty
© Photographer: Kenneth Paul | Agency: Dreamstime.com
Overall, the standard of beauty in Western countries generally veers toward a mature, seductive, sexy, and sultry look while in Asia, especially Taiwan, China, and Japan, the standard of beauty reflects youth, innocence, purity, and cuteness. With this in mind, I cast a model who embodied all of these traits perfectly.
Portrait of Chinese woman clear skin
Chinese woman modeling for beauty shoot
© Photographer: Kenneth Paul | Agency: Dreamstime.com
All the photos were shot on a Canon 6D with a Canon 70-200 F2.8 L lens. The lighting was a standard beauty lighting clamshell setup for most of the shots. The key light was a monolight in an 80 cm brolly box on top with a reflector at the bottom. Two V-flats were used in front and two monolights used on the white background. The key light was placed relatively low for less contrasty, flatter look. The two white V-flats in front were also added to reduce shadows. Two black V-flats were put on the sides to add definition to the outline of the face.
Asian female applying mascara
Chinese woman applying mascara for beauty shoot
© Photographer: Kenneth Paul | Agency: Dreamstime.com

For more photos from this series and others, see this set:
shutterstock asian beauty skincare chinese taiwanese